Appearance
Using custom web fonts
Important
This article applies to versions of Cascade prior to 1.4.2.
If you use a different version of Cascade, refer to the following guides instead:
Note
This is an advanced customization guide that requires editing theme code. These actions are not supported by Switch Themes or Shopify. We recommend hiring an expert if you're not comfortable editing Liquid, HTML, CSS, and Javascript.
Before you customize a theme, make a backup. Refer to Shopify help: Duplicating themes
Our themes use Shopify's Font Picker to access hundreds of premium and open source fonts. Using a font that's not available in Font Picker requires editing the theme code. This is a two-step process:
Load the font
Load your custom font from a font service or a web font file.
Load from a font service
If you use a font service, like Adobe Fonts, Fonts.com, TypeNetwork, Cloud.Typography, or Google Fonts, you'll have a code snippet similar to the following:
html
<link rel="stylesheet" href="https://use.typeservice.net/a1b2c3d4.css"><link rel="stylesheet" href="https://use.typeservice.net/a1b2c3d4.css">Copy your code snippet. In the Code Editor, open the file theme.liquid. Paste the copied snippet into a line before the closing </head> tag. Then, proceed to Apply the font (the next step in this guide).
Load from a web font file
Note
Ensure your font license allows embedding fonts into a website, and that your traffic is within the page view limits stated by your license. If you're unsure, contact the font's vendor.
You can load a font from a web font file, like a .woff, .ttf, or .eot file.
In the Code Editor, navigate to your theme's Assets folder. Select Add a new asset. Use the Upload file tab to select and upload your web font file. To add more than one font, upload one font file at a time.
Note
To learn why you need all of the font files, refer to Chris Coyier's article CSS-Tricks: How to use @font-face in CSS
Next, add the font file(s) into the snippets/css-variables.liquid file by using a @font-face declaration. Ensure the declaration occurs after the opening <style> tag. Refer to Mozilla Developer Network: @font-face
Note
Reference fonts by using Shopify's asset filter Refer below for an example of using the asset filter for a custom font.
If you uploaded .woff files only, add the following to the top of the file snippets/css-variables.liquid:
css
@font-face {
    font-family: 'Font Name'; /* Enter a name for the font */
    src: url('{{ 'Exact-name-of-the-file-you-uploaded.woff' | asset_url }}') format('woff');
    font-weight: normal;
    font-style: normal;
}

@font-face {
    font-family: 'Font Name'; /* Same as above */
    src: url('{{ 'Exact-name-of-the-file-you-uploaded-italic.woff' | asset_url }}') format('woff');
    font-weight: normal;
    font-style: italic;
}

@font-face {
    font-family: 'Font Name'; /* Same as above */
    src: url('{{ 'Exact-name-of-the-file-you-uploaded-bold.woff' | asset_url }}') format('woff');
    font-weight: bold;
    font-style: normal;
}
@font-face {
font-family: 'Font Name'; /* Enter a name for the font */
src: url('{{ 'Exact-name-of-the-file-you-uploaded.woff' | asset_url }}') format('woff');
font-weight: normal;
font-style: normal;
}
@font-face {
font-family: 'Font Name'; /* Same as above */
src: url('{{ 'Exact-name-of-the-file-you-uploaded-italic.woff' | asset_url }}') format('woff');
font-weight: normal;
font-style: italic;
}
@font-face {
font-family: 'Font Name'; /* Same as above */
src: url('{{ 'Exact-name-of-the-file-you-uploaded-bold.woff' | asset_url }}') format('woff');
font-weight: bold;
font-style: normal;
}Now you've a font-family value that you can reuse in CSS rules.
Apply the font
To change the font that's used for headings or body text, update the corresponding CSS custom property that's defined in the file snippets/css-variables.liquid.
Note
To learn about CSS custom properties, refer to Mozilla Developer Network: Using CSS custom properties
In the file snippets/css-variables.liquid, locate the lines that contain --heading-font-stack and --body-font-stack. Replace the values with the new font that you declared.
css
:root {
    --heading-font-stack: 'Font Name'; /* Same as above */
    --heading-font-weight: normal /* Same as above */

    --body-font-stack: 'Font Name'; /* Same as above */
    --body-font-weight: normal /* Same as above */
}
:root {
--heading-font-stack: 'Font Name'; /* Same as above */
--heading-font-weight: normal /* Same as above */
--body-font-stack: 'Font Name'; /* Same as above */
--body-font-weight: normal /* Same as above */
}Load and apply an example font
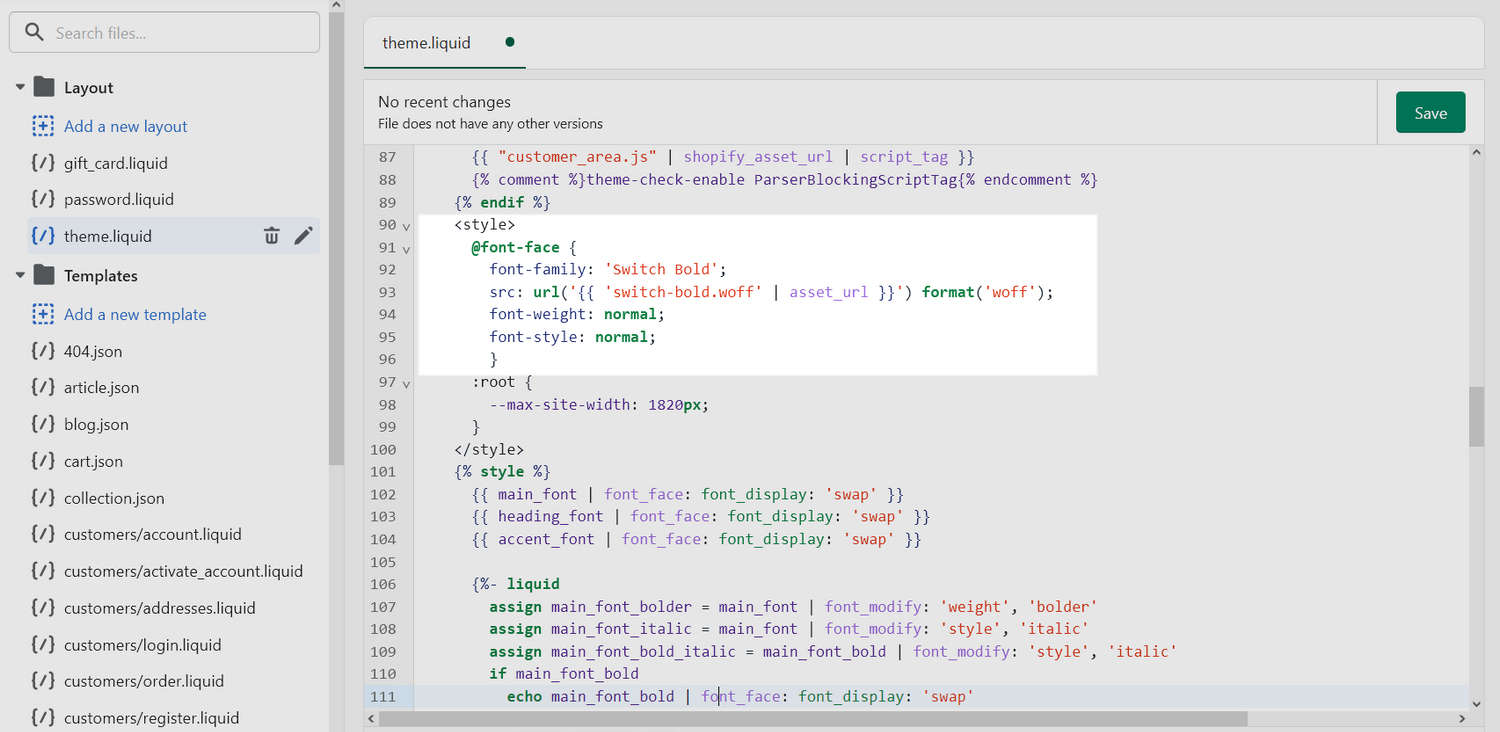
In the following example, a custom font named Switch Bold is loaded from a web font file named switch-bold.woff. Then, the Switch Bold font is applied as the Heading font.
css
@font-face {
font-family: 'Switch Bold';
src: url('{{ 'switch-bold.woff' | asset_url }}') format('woff');
font-weight: normal;
font-style: normal;
}
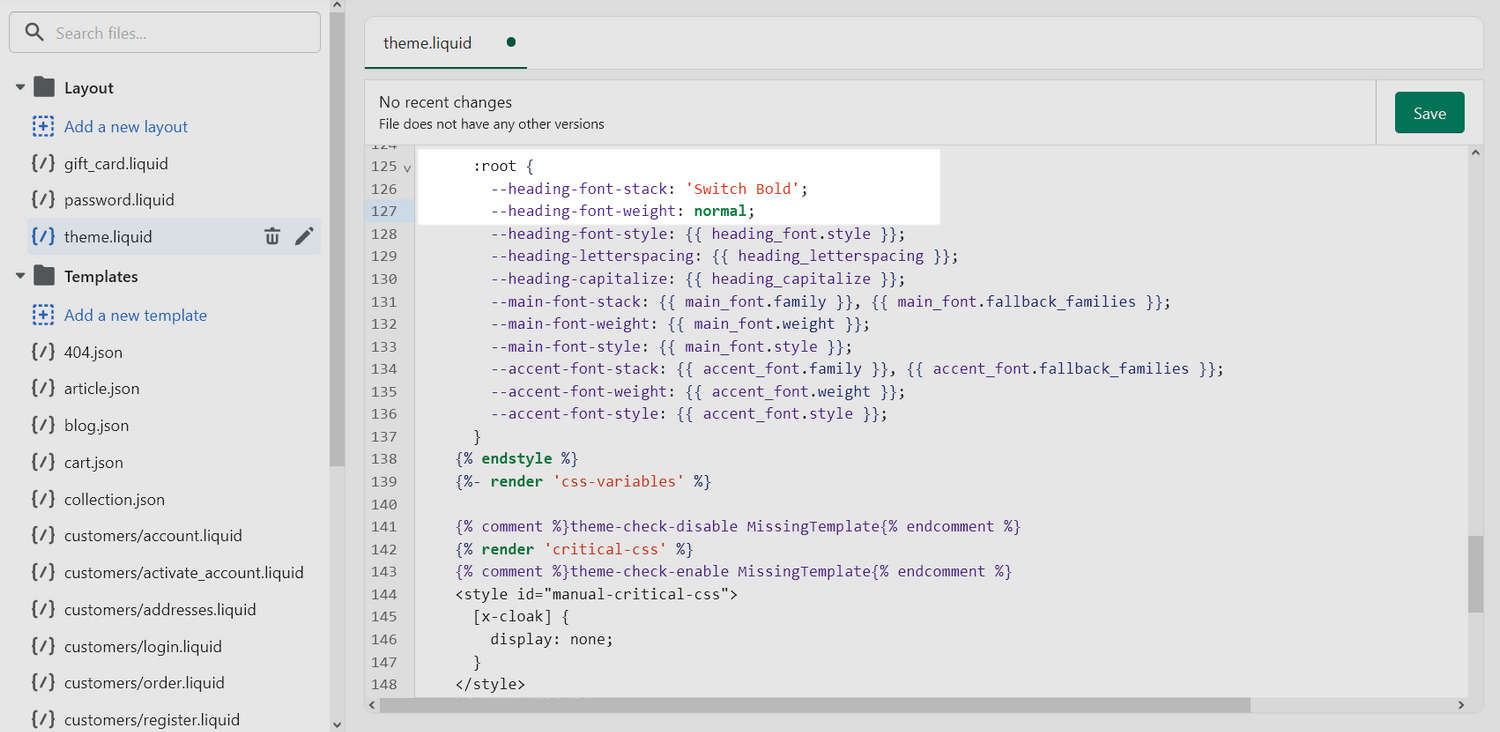
:root {
--heading-font-stack: 'Switch Bold';
--heading-font-weight: normal;
}@font-face {
font-family: 'Switch Bold';
src: url('{{ 'switch-bold.woff' | asset_url }}') format('woff');
font-weight: normal;
font-style: normal;
}
:root {
--heading-font-stack: 'Switch Bold';
--heading-font-weight: normal;
}In the following image, the code to declare the font is displayed in the Code Editor.
In the following image, the code to apply the font as the Heading font is displayed in the Code Editor.
In the previous example, the Switch Bold font is applied to all elements in the Heading font stack. To apply a font only to specific elements, identify the target element's CSS class. Refer to Use web inspector. Then, add a custom CSS rule for the element's font in the stylesheet theme.min.css.