Appearance
Use the Web Inspector
Note
This is an advanced customization guide that requires editing theme code. These actions are not supported by Switch Themes or Shopify. We recommend hiring an expert if you're not comfortable editing Liquid, HTML, CSS, and Javascript.
Before you customize a theme, make a backup. Refer to Shopify help: Duplicating themes.
Using your browser's Web Inspector tool provides a good way to identify parts of the theme code that you want to modify. This guide uses the Google Chrome web browser for Mac. Other browsers, like Safari and Firefox, have similar developer tools and features. To apply this guide to another browser, check your browser's documentation. Refer to Learn more.
Find an element's CSS classes
To customize theme code, you must know the CSS classes that apply to the element you want to modify. To idenitify an element's CSS classes:
- In a web browser, open a page with an element to modify.
- Right-select the element.
- Select Inspect.
- Review the contents of the Elements pane.
When an element is selected in the Elements pane, the applicable classes are displayed in the class attribute. An element can be nested inside other elements, which might also contain classes that affect the appearance or behavior of the element you want to modify. Refer to Chrome developer: View and change CSS.
In the following video, the Web Inspector tool is used to identify the CSS classes that apply to an element on an example store's homepage.
Classes and CSS properties
Our themes use single-purpose CSS classes, like f--title or p2, and "traditional" semantic CSS applied with classes like featured-content__title.
To re-style elements that use CSS classes, change their markup in the corresponding Liquid template. You can edit semantic CSS classes in the theme's stylesheet file: usually theme.scss.liquid or theme.css.liquid. Refer to Use customize CSS..
For example, to increase the font size of an element styled with font-size--xl, change its markup to use the font-size--xxl class. Increasing the font size of an element like featured-content__title involves finding the element in the stylesheet, and then changing the value of its font-size property.
Example 1
As an example, let's review an element on the home page for the Editorial - Amour demo store.
To determine how to change the font size for the first Featured image with text overlay section, right-select the text, and then select Inspect.
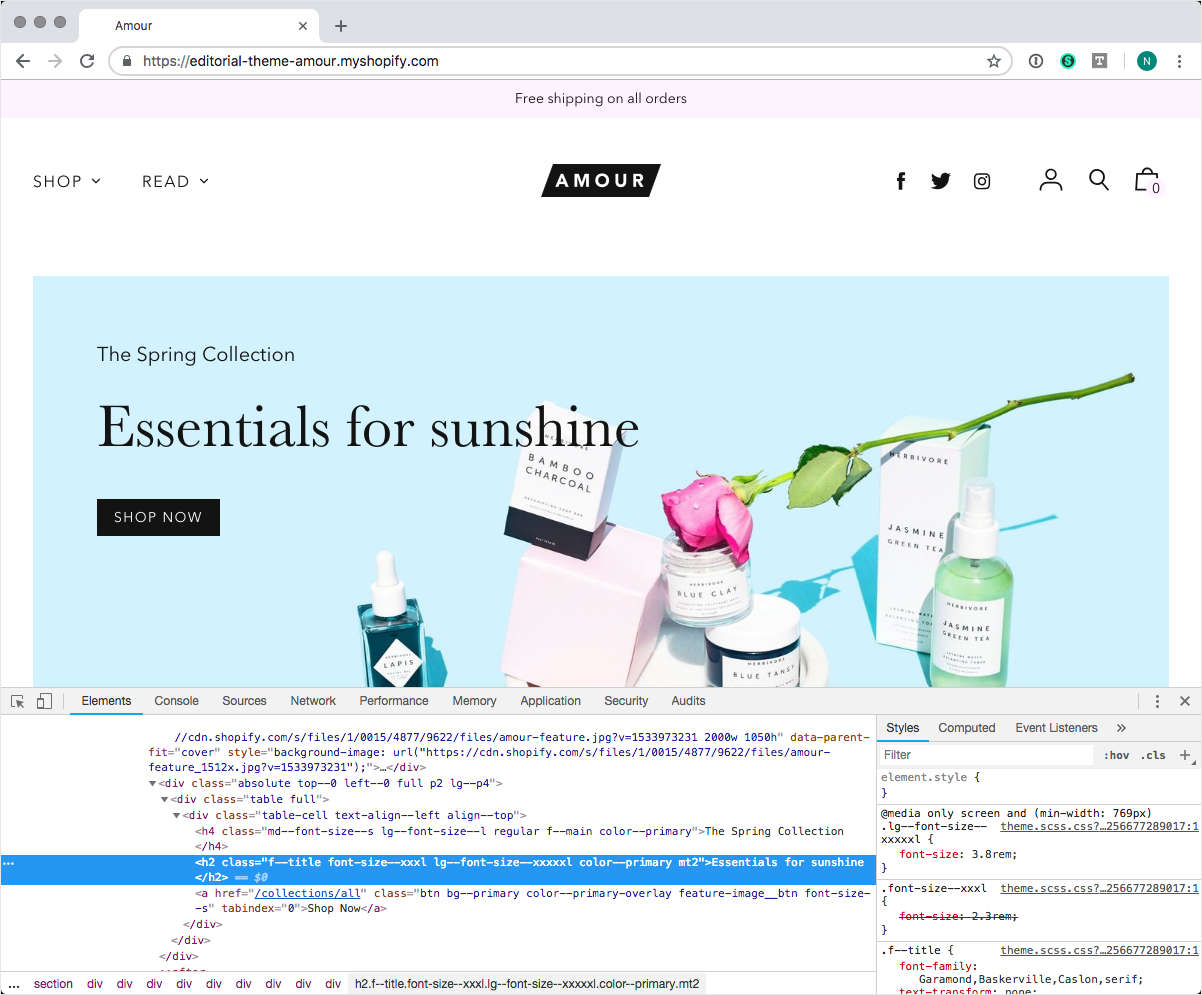
In the Elements panel, note that the
h2element is selected. The panel indicates that two classes apply to the element:font-size--xxxlandlg--font-size--xxxxxl.In the Styles panel, confirm that one of these classes is actively setting the
font-sizeproperty for the element.To change the font size for the
h2element, edit the Liquid template for the Featured image with text overlay section.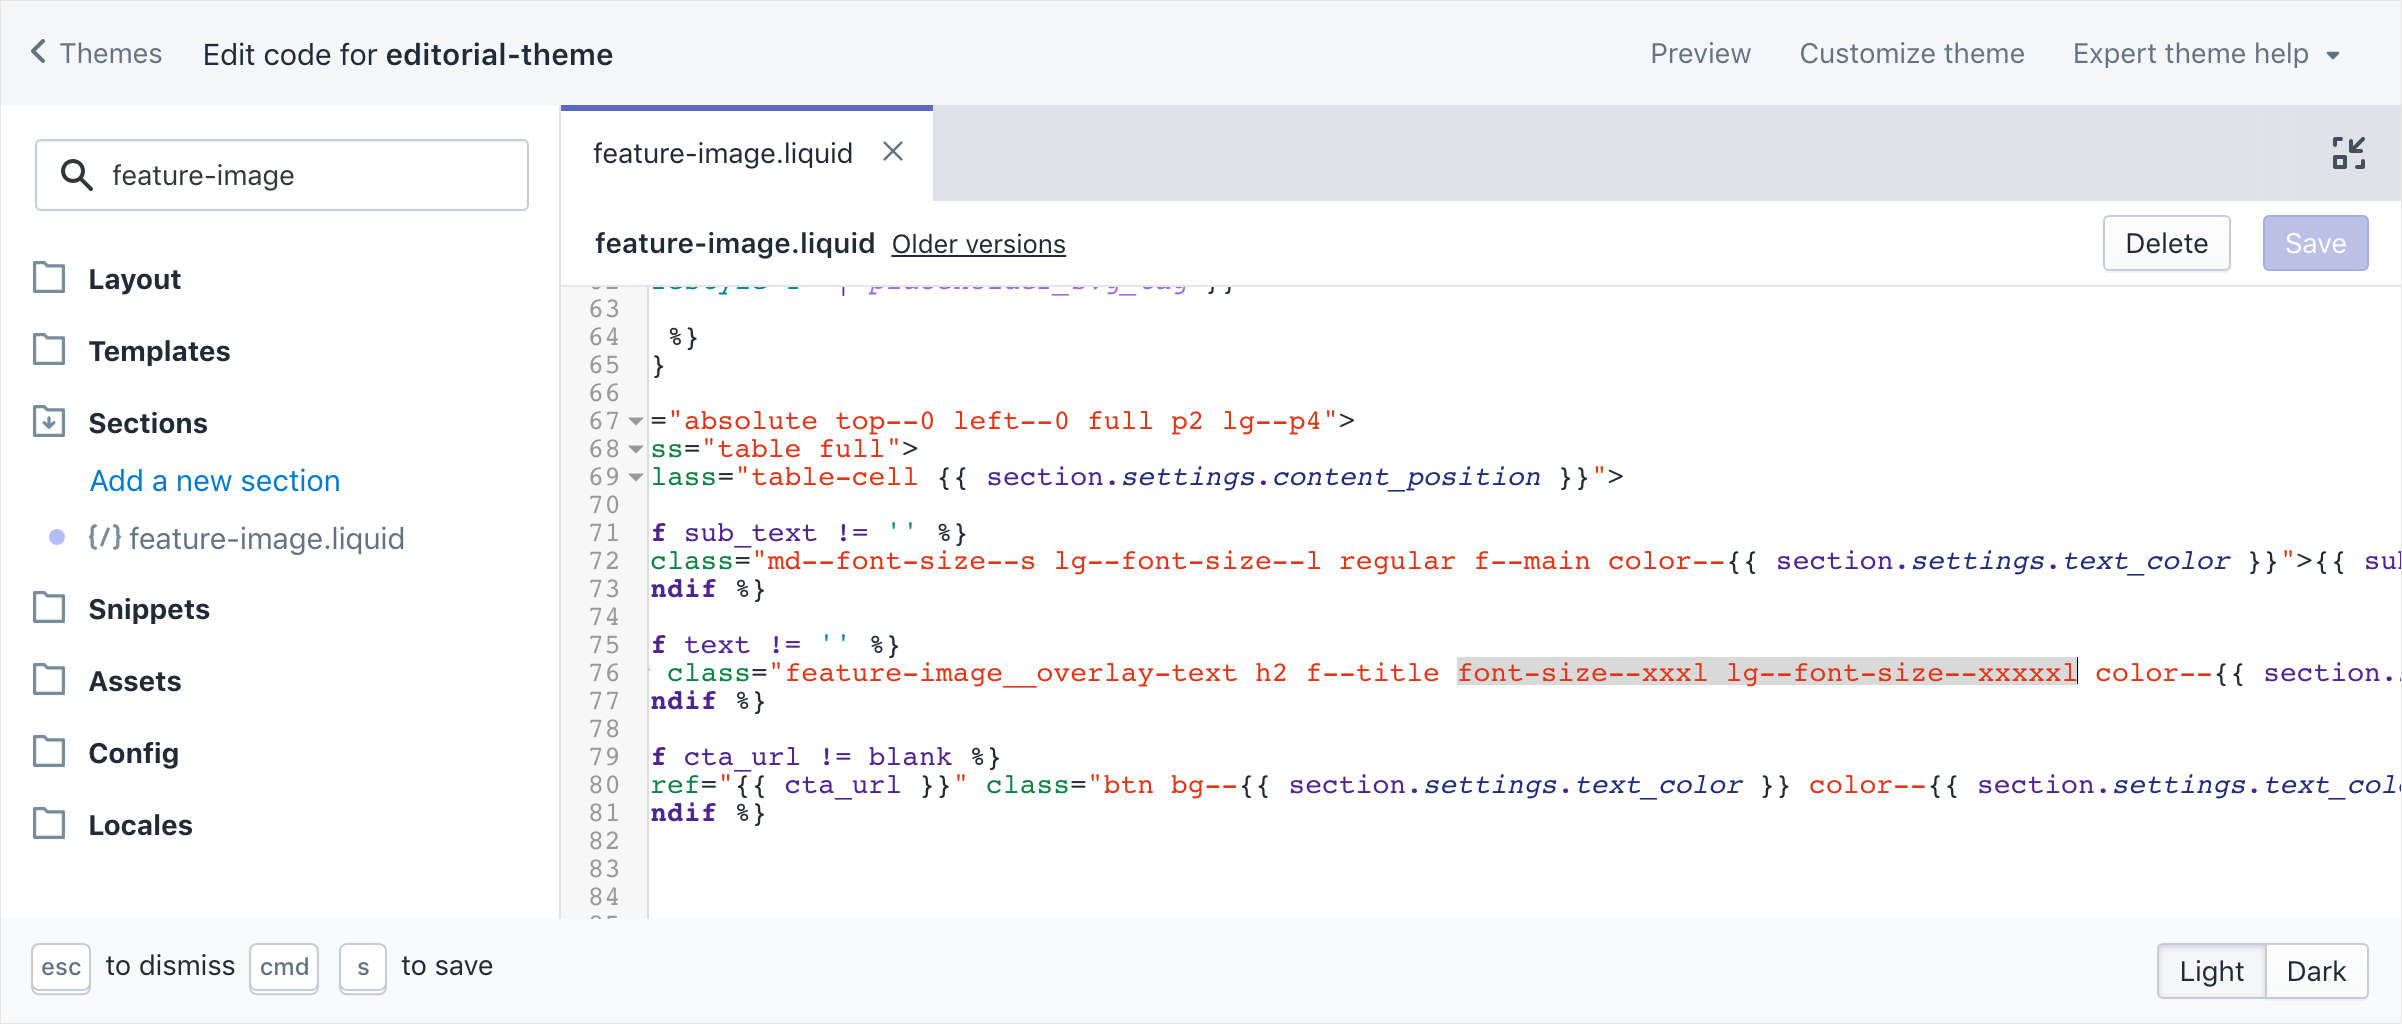
Example 2
As second example, let's review another home page element on the Editorial - Amour demo store.
To determine how to tweak the font sizes for the Featured content section, right-select the text, and then select Inspect.

In the Elements panel, note there are no single-purpose CSS class applied to the section. Instead, the class
featured-content__title--mediumis applying the font size of 3.6rem to theh2element.To change the font size for this element, find the corresponding rule in theme's stylesheet, and then change the value of its
font-sizeproperty.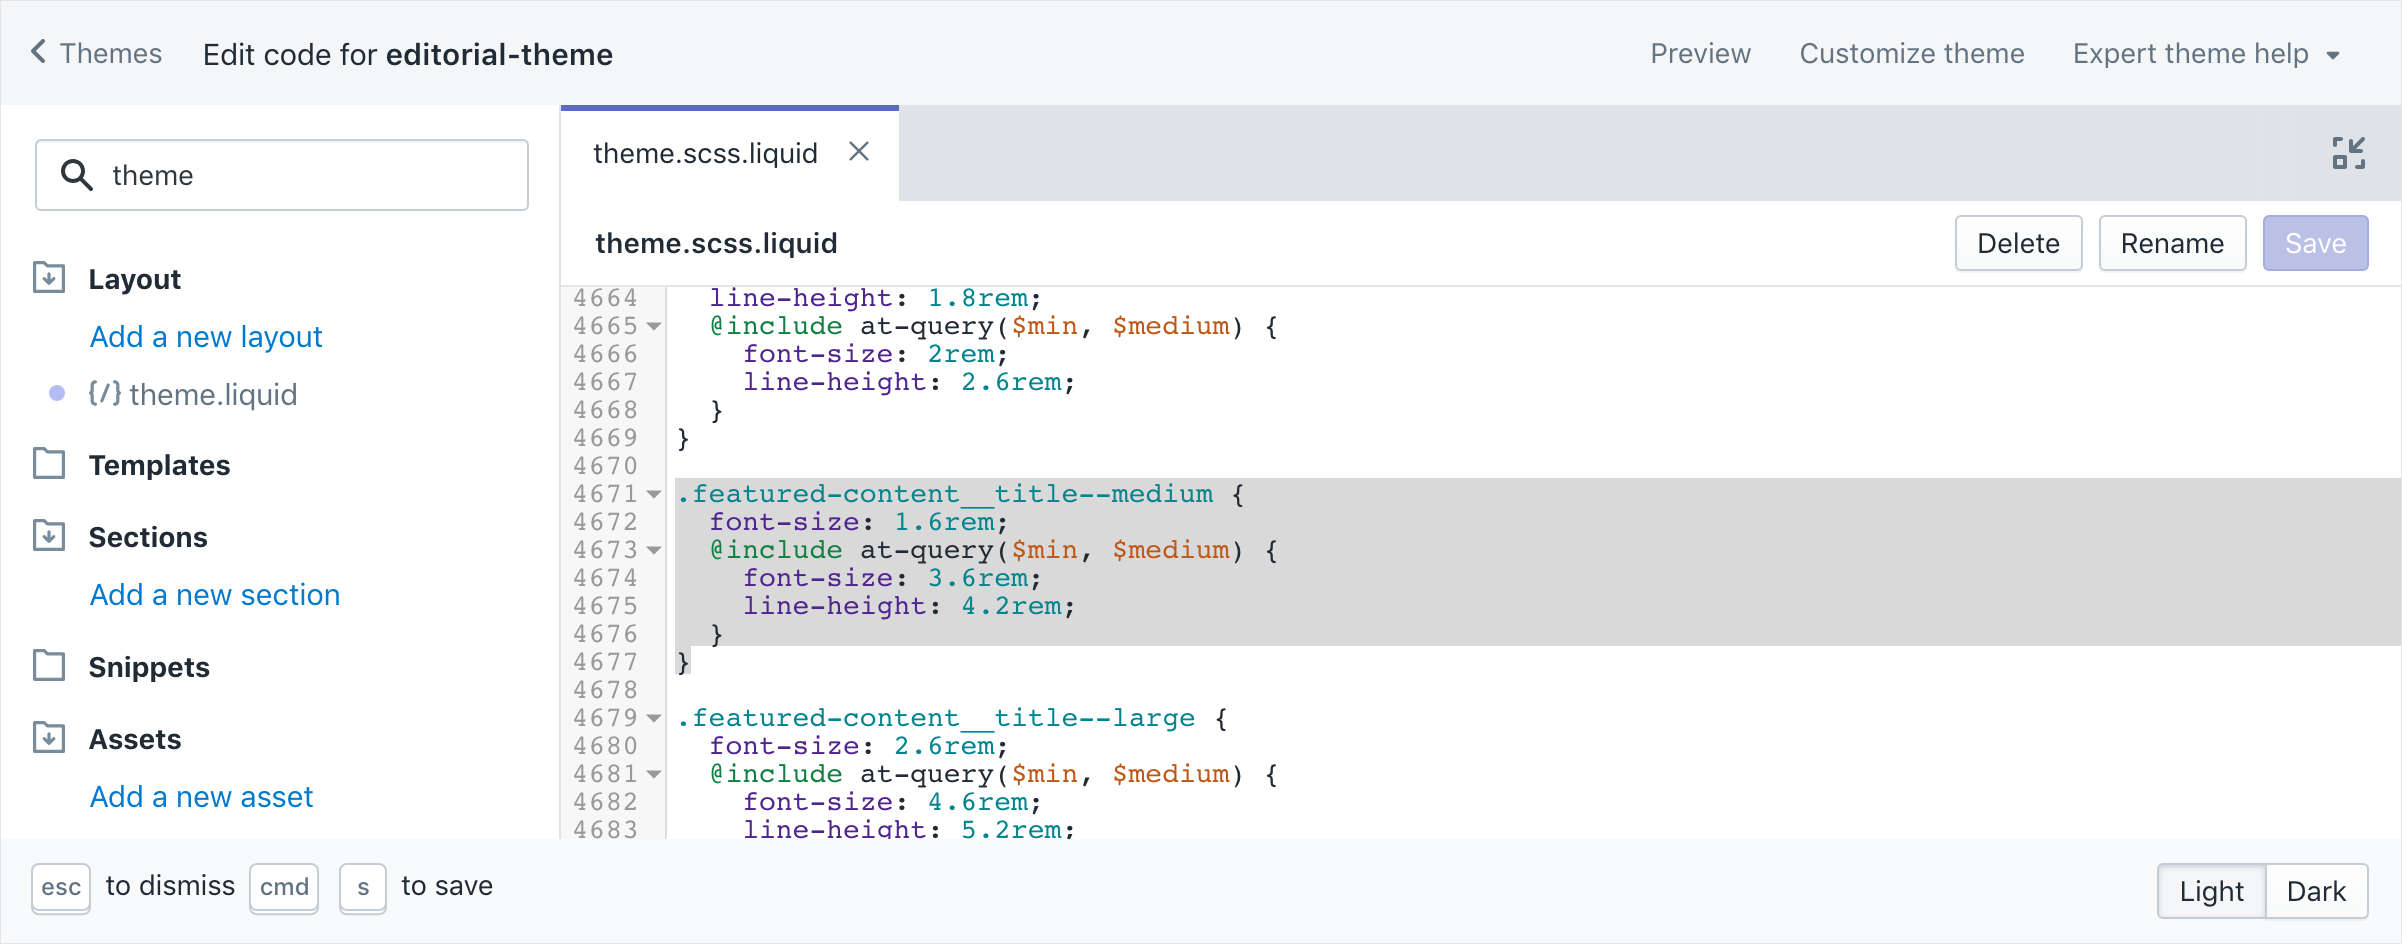
Learn more
Refer to the following links to developer tools and features for different browsers.