Appearance
Blog pages
This guide describes setting up your store's Blog pages section. Use the section to set how blogs posts are displayed on your store's blog pages. Refer to Shopify help: Blogs.
The following video shows a blog pages section on a store's blog page. In the video, by adjusting the Desktop image position dropdown, the blog post images are repositioned from the left to alternating right and left.
For general guidance with modifying sections, refer to Sections overview.
Set up a blog pages section
To set up a blog pages section:
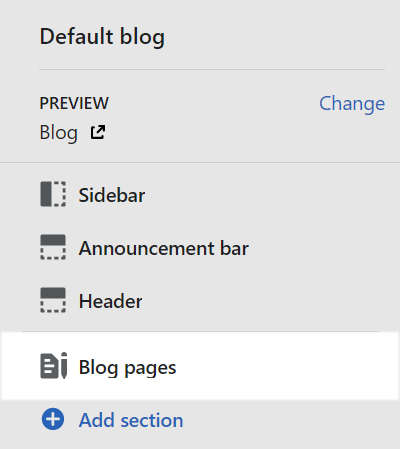
Go to Customize theme. At the top of the page, use the dropdown to select Blogs > Default blog.
Note
The section is available only on the default blog page.
To add Content sections into the current page, select Add section, from the side menu, and then choose a section to add. Refer to Shopify help: Add a section.
From the side menu, select Blog pages.
Select a section setting described in the following table.
| Section setting name | Description |
|---|---|
| Layout | Select the Layout dropdown to set the layout for blog posts inside the section. The options are Feature (posts stacked vertically) or Grid (posts stacked horizontally). |
| Show title | Select the Show title checkbox to show/ hide the blog title inside the section. |
| Show rss | Select the Show rss checkbox to show/ hide a link for Really Simple Syndication inside the section. If the title is hidden, the RSS link will also be hidden. Refer to Shopify help: Invite customers to subscribe to your blog. |
| Enable filtering by tag | Select the checkbox Enable filtering by tag to show/ hide the blog post filtering options inside the section. If enabled, visitors can select a range of posts within a blog by using blog post tags as filtering criteria. Refer to Shopify help: Creating and using tags in Shopify. |
| Feature layout > Content position | Select the Content position dropdown to align text inside the blog post tiles. The dropdown options are Top, Middle, and Bottom. To use this setting, set the Layout dropdown to Feature. |
| Feature layout > Desktop image width | Select the dropdown Desktop image width to set a width for the images inside the blog post tiles. This setting applies to desktop displays, and the dropdown options are: One third, One half, Three fifths, and Two thirds. The image and text tiles are resized accordingly. To use this setting, set the Layout dropdown to Feature. |
| Feature layout > Desktop image position | Select the dropdown Desktop image position to set a position for images inside the blog post tiles. This setting applies to desktop displays, and the dropdown options are Left, Right, and Alternate (right, then left). To use this setting, set the Layout dropdown to Feature. |
| Articles > Show author | Select the checkbox Show author to show/ hide the name of each blog post's author inside the blog post tiles. |
| Articles > Show date | Select the checkbox Show date to show/ hide the date of each blog post inside the blog post tiles. |
| Articles > Show excerpt | Select the checkbox Show excerpt to show/ hide a summary of each blog post inside the blog post tiles. |
| Articles > Show tags | Select the checkbox Show tags to show/ hide the tags associated with each blog post inside the blog post tiles. |
| Articles > Show comments | Select the checkbox Show comments to show/ hide the readers' comments associated with each blog post inside the blog post tiles. |
| Articles > Show read more link | Select the checkbox Show read more link to show/ hide a Read more button, inside the blog post tiles, for accessing the full blog post. |
| Articles > Crop images | Use the Crop images dropdown to set the shape of the images inside the blog post tiles. The dropdown options are No crop, Landscape, Square and Portrait. |
| Articles > No of posts per page | Use the slider No of posts per page to set the number of blog posts/ tiles to display on each blog post page. The minimum slider value is 3 posts and the maximum is 12. |
| Color > Color scheme | Use the Color scheme dropdown to set the color scheme for the section to Primary, Secondary or Tertiary. Refer to Customize color schemes. |
| Color > Use this color scheme for header and footer | Select the checkbox Use this color scheme for header and footer to turn on/ off applying the section's color scheme to the header and footer. This setting applies only to the blog template/ default blog page. |
| Theme settings | Select Theme Settings to access additional settings for the section. Refer to Section theme settings menu. |